How to adjust your bike
25.03.2024
While I am far from being a professional bike fitter I do spend my days designing bikes and a big part of that is ergonomics. I also spend a considerable amount of time riding through town where it often surprises me how many people are riding bikes that are either way too large or way too small for them. Others are riding bikes that may fit them, but they just aren’t adjusted properly with the seat being too high or too low.
Coh&Co does not offer bike fitting, but we do like to provide some down-to-earth guidance to help our customers choose and adjust their new bikes. Ergonomic considerations also play a role in how and why we design our bikes as we do. I want to touch on a few points that should help you feel more comfortable on your bike and improve your riding performance.
First off it’s important to think about how you prefer to ride. If you are the type of rider who likes to sit upright and look ahead as though you were sitting at a dining table, then you will probably feel most comfortable on a shorter frame with a slightly higher handlebar and a broader seat. If you prefer to zip through town in a bit more of a road bike position then you’ll probably want your bars a bit lower and a narrower saddle.
If you are a rider who treads on the pedals one at a time, then you may feel more comfortable with a slack seat tube angle positioning you a bit behind the pedals like on a classic, upright-riding urban bike. However, if you are the type of person who prefers to spin and to keep your cadence high like you’re riding a road bike then you’ll probably want a steeper frame that positions you a bit more on top of the pedals.
So with these thoughts in mind let’s take a quick look at how to adjust your bike. A good bike fit is all about optimising the contact points between you and your bike. Here are some key points and some tips for measuring them yourself. Remember, you should visit a professional bike fitter if you are looking to alleviate a specific pain or peak your performance.
Frame Size being the foundation of a good fit, it’s probably best to begin before buying a bike. Although frame size is often based on seat-tube length and thus inseam length, at Coh&Co we base our sizes on the length of a frame. We do this because we think of seat height and handlebar height to be adjustable parameters, whereas frame length is fixed and not very adjustable without stretching the frame.
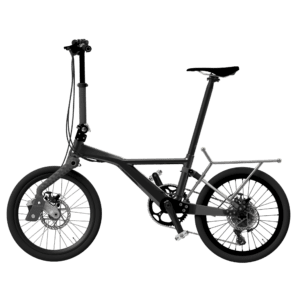
An exception to this is our folding bike Siggi, which allows a rider to not just adjust the height of the saddle and handlebars, but also the forward and aft positioning of the bars; and therefore effective frame length. This is also a good way to tune riding characteristics for different riding positions. Our Erik bikes on the other hand are designed for a moderately sporty forward riding position. They are also intended to support you in a position that will allow you to keep aware of the traffic around you. We try to accommodate this by keeping the top tube a bit shorter than we would on a performance road bike. This also provides an intermediate riding position.
Generally, I have noticed that people tend to gravitate towards frames that are too large for them. Often requiring a low saddle position, and the need to stretch to reach the brakes – especially when running drop-bars. If you’re in doubt, it is better to have a bike in a smaller size as opposed to it being too large.
Saddle Height is crucial for power transfer and comfort. Too high and you will need to rock and roll from side to side to reach the pedals on each stroke and that can load up the hips and bring on saddle sores, while too low can overload your knees and bring on hip pains. Saddle placement is not a millimetre science, but you will most likely feel a centimetre or even half a centimetre. Ideally, with the crank arm at the bottom of the pedal stroke (06:00), your leg should be (very) slightly bent with your heel on the pedal while sitting evenly on the saddle in a relatively normal riding position. YES! I did write heel. This is a pretty good rule of thumb that will help you adjust the saddle height at a height that will allow you to ride without needing to rock on the saddle or point your toes downwards to reach the pedals.
I measure saddle height with the crank arm at the bottom of the pedal stroke at 6 o’clock. Your leg should be very slightly bent with your heel on the pedal while sitting evenly on the saddle in a relatively normal riding position. YES, I did say heel! This position is a pretty good rule of thumb that will help you adjust the saddle to a height that will allow you to ride without needing to rock back & forth or point your toes downwards to reach the pedals.
Where you sit on the saddle can also affect power and comfort. Adjusting the saddle fore and aft on its rails will also help to tune your riding experience. In general, for road cycling a good starting point is to have a plumb line (a line dropped from your kneecap) bisect the axle of the pedal when the crank arm is at 3 o’clock. Riding an urban bike you may find that you are a bit behind this. Fore and aft position can also be used to fine tune your reach but it should not be used to compensate for a frame that is too long or too short. This adjustment is very much a question of personal preference.
Saddle pitch can also really affect your comfort. A saddle that is pitched down in the front will encourage you to slide forward on the narrow part of the saddle causing discomfort and putting undo strain on your hands and arms. Pitching it up does the opposite. In general, keeping the long part of the saddle as level as possible is a good place to start and then fine-tune it if you feel yourself moving too far forward or backwards.
Like most things that concern comfort, saddles are very much a personal preference, but they are also a question of how your bike is set up. In general, a narrow saddle is more suited to a more aggressive riding position while a wide cushy saddle will work better for a sit-up and look-ahead riding style. If you’re experiencing discomfort then start by considering your riding position and a saddle adjustment before running out to buy a new saddle.
Now we get to the front end of the bike. Reach and drop are two issues that although usually less relevant for the urban cyclist can be important, especially on long stretches on the road. Reach refers to the distance from the saddle to the handlebars while drop refers to the height difference between the saddle and the bars. While a classic urban bicycle will often have the handlebars positioned above the saddle, a road bike with drop bars will often place the bars below the saddle height to allow for a more aggressive riding position. At Coh&Co we keep the bars at just around or below the intended saddle height and when combined with a shorter reach this affords a sporty moderate riding position.
Reach and drop affect comfort, power, and handling. Unfortunately, this is one of the trickier aspects of measuring yourself. A good reference point is a comfortable position where your back has a slight bend you should be positioned more upright for recreational riders and more forward for performance riders. This varies greatly with your body proportions. Somebody with relatively long legs will need a shorter cockpit while someone of the same height with a longer torso will require a longer cockpit. When running drop bars it’s a good idea to measure yourself so that you’ll be comfortable on the brake-hoods where you’ll spend much of your time. Otherwise, you’ll tend to move back to the bars which will make you bend and twist your wrists which can cause discomfort, numbing in your hands and even shoulder pains.
Finally, we are on to handlebar width. Once again this is also a function of riding style. If you’re sitting upright you can get away with a wider set of bars and if you are riding off-road or standing up a lot, then a wider set of bars may work well for you. In general, your bars should allow your arms to extend straight forward. Unfortunately, most bikes with drop bars are fitted with handlebars on the wide side. A good rule here is that your bar width should match your shoulder width. Shoulder width is measured across from side to side where the bony part of your shoulder meets the arm with out taking your arms into account. Your bar width should measure the distance between the centre of the brake hoods.
Flatbars, or similar versions of bars with or without an angle or a rise may be less critical, but they may also affect comfort depending on your riding position and how much weight you are putting forward onto the bars.
I hope some of the above can help you adjust your bike and get you more comfortable. Please remember that if you are struggling with specific pains or recurring discomfort then a professional bike fitter can take into account your body measurements, riding style, and flexibility to create a personalized fit that will maximize your comfort, power, and efficiency.